
Free 3D-printed HC-SR501 PIR sensor case with a rim clip (STL download)
A free 3D-printed case for the HC-SR501 PIR motion sensor with a snap-on lid and a sawtooth clip that grips a 9.7 to 11.5 mm tank or tote rim. STL and OpenSCAD downloads, the exact ABS print settings, and the real print timelapse.
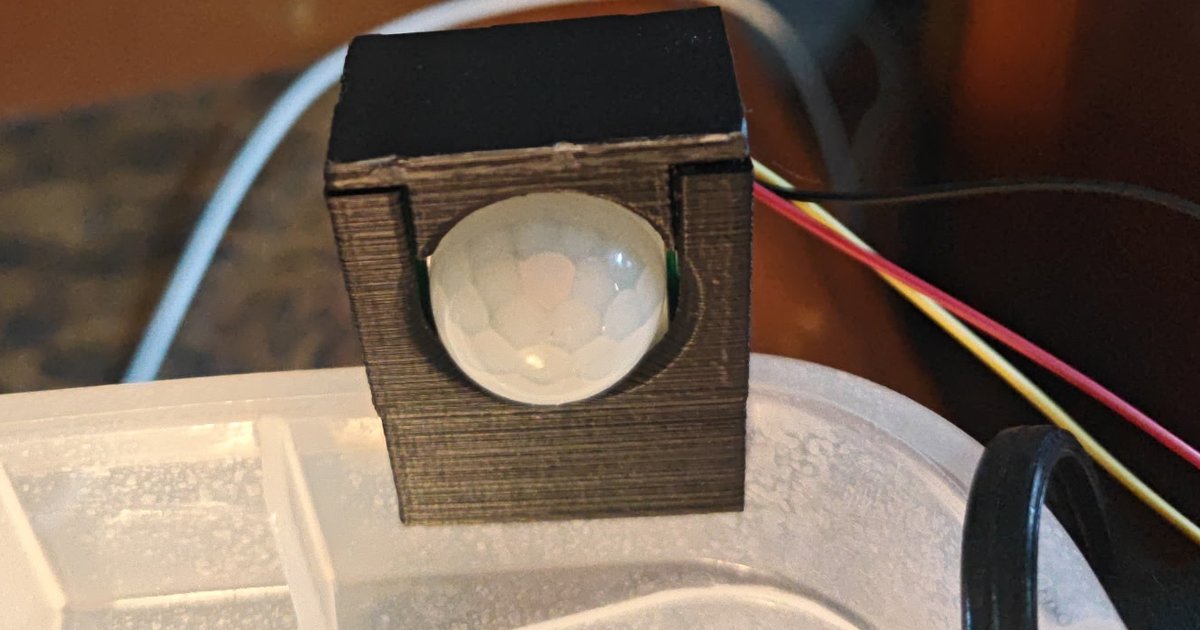
The HC-SR501 is the cheap PIR motion sensor in a lot of DIY builds, and it usually ends up taped or zip-tied somewhere. This is a free case for it that clips straight onto the rim of a tank or tote: the board slides in, a lid snaps on, and a sawtooth U-clip underneath grips the rim. It was designed for a turtle tote whose rim measured 9.5 to 10.2 mm, and the OpenSCAD source is included so the clip can be changed for a different rim.
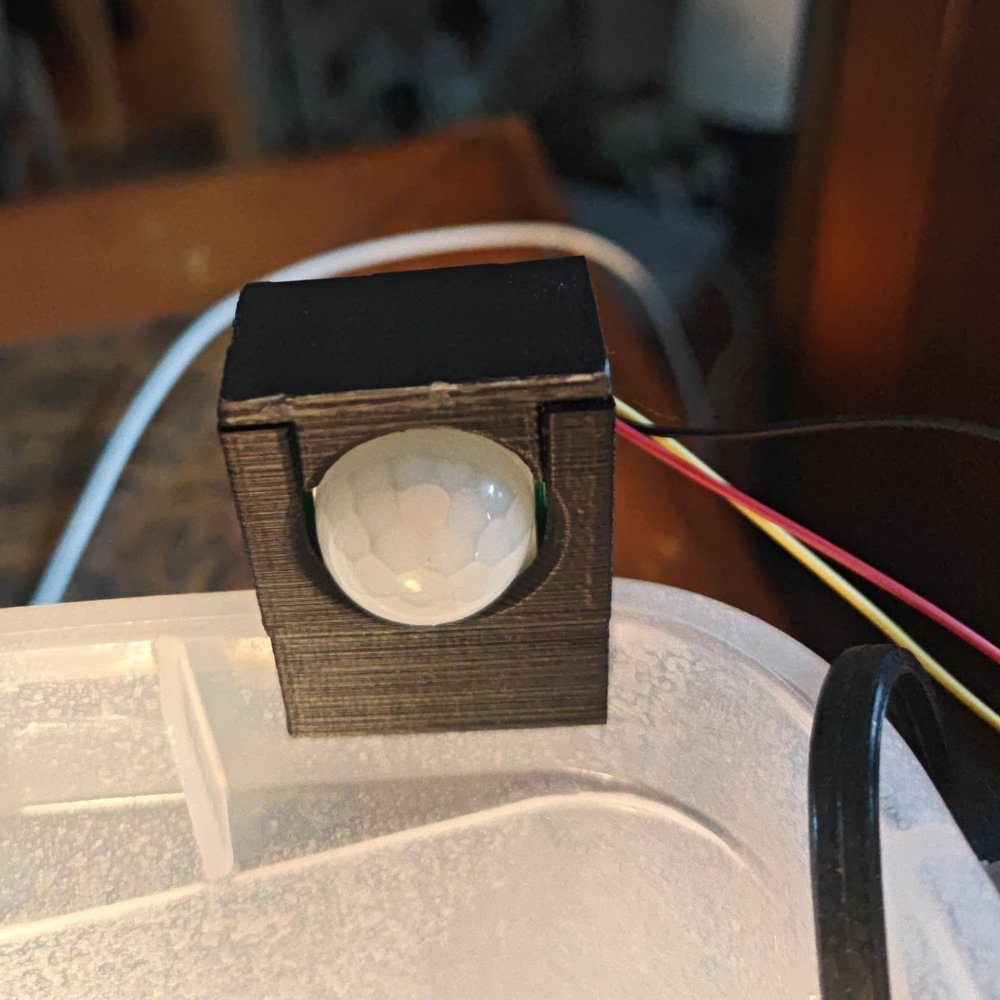
Printed and assembled
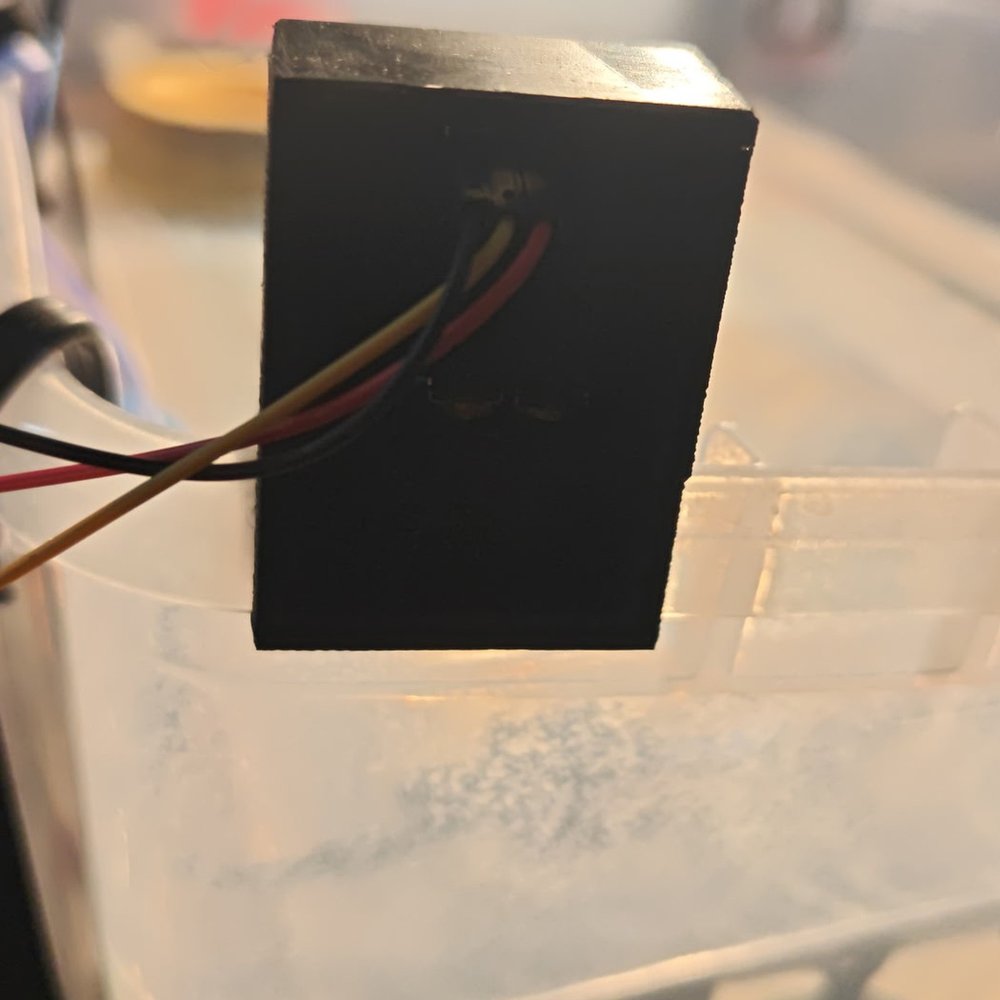
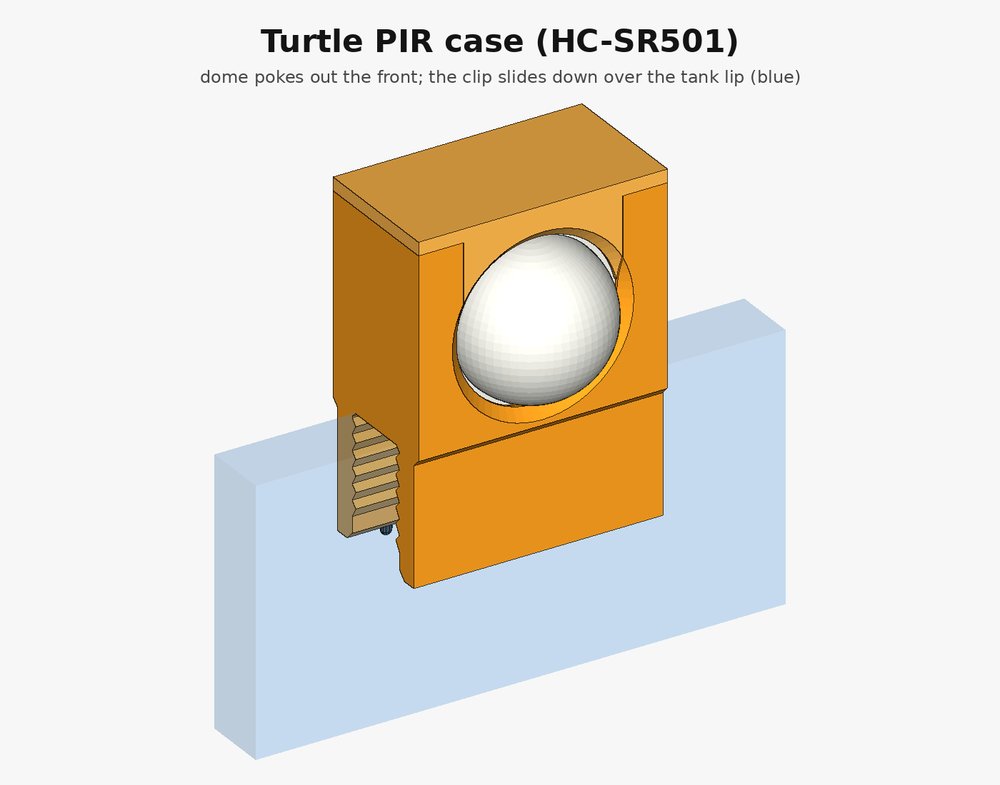
The photos here are the real case, printed in ABS, with an HC-SR501 inside and clipped onto the tote. The lens dome looks out through the front window, and the three Dupont wires come out of the slot in the back.
Downloads
- turtle_pir_case_body_print.stl (163 KB): the case body with the clip, already oriented for printing
- turtle_pir_case_lid_print.stl (76 KB): the snap-on lid
- turtle_pir_case.scad: the editable OpenSCAD source
- abs_raft_profile.ini: the PrusaSlicer profile the case was sliced with
- Everything as one zip
Also on Printables. License: CC BY 4.0, Charles Hartmann / Homelab the Right Way.
What it fits
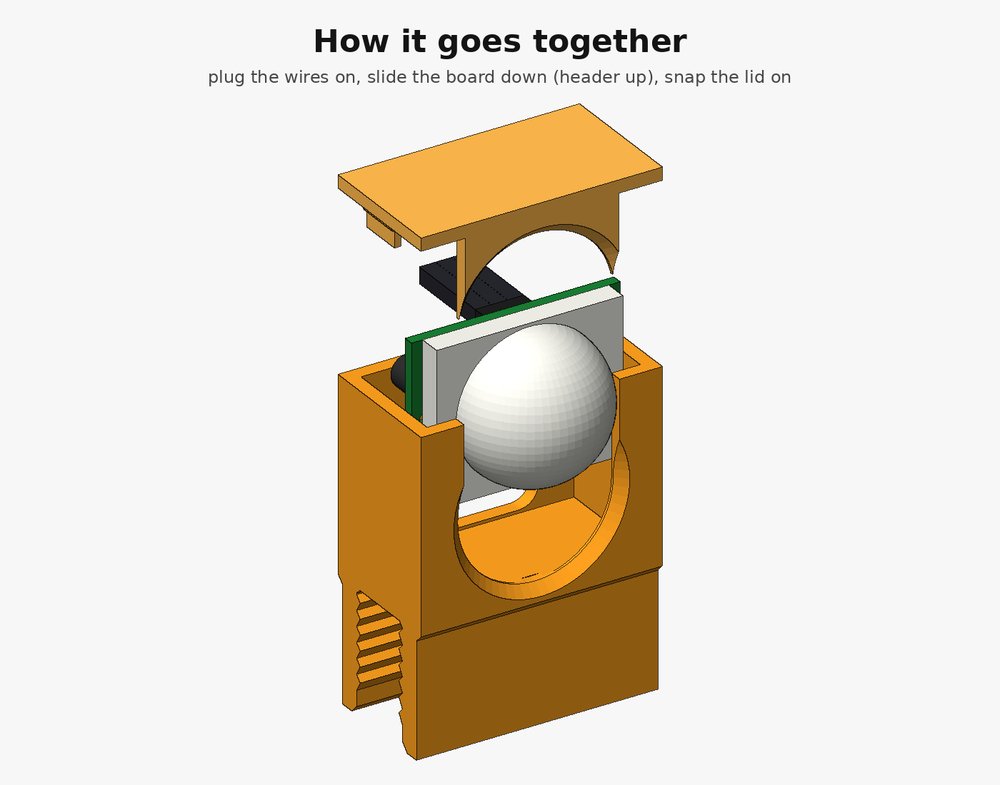
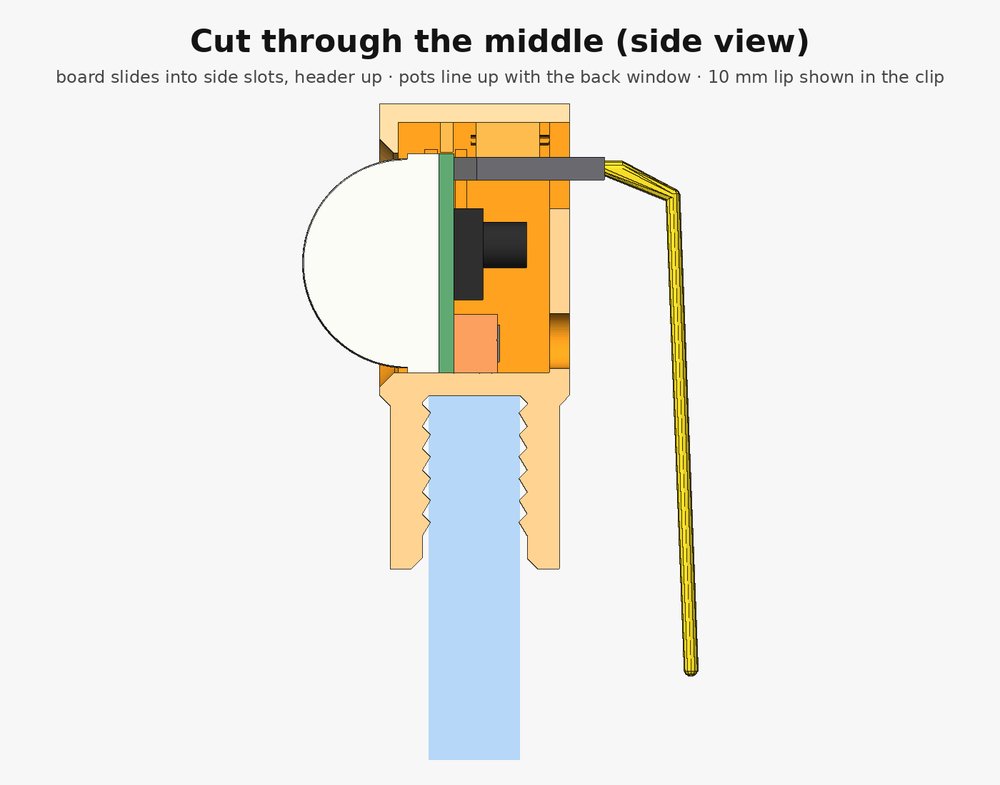
The standard HC-SR501 board: a 32.5 x 24 mm PCB, a 23 mm lens dome that stands 15 mm off the board, the 3-pin header on one long edge and the two trim pots on the other. The board slides down into slots in the side walls (2.0 mm slots for the 1.6 mm board), header edge up, with the Dupont plugs already on.
The case
- Size: 37.6 x 20.8 x 32 mm with the lid, 51 mm tall including the clip. 2.2 mm walls, 2.5 mm floor, 2.0 mm front.
- Front: a 24.2 mm window for the dome, which sticks out about 8.5 mm. A 1.6 mm outer chamfer keeps the wall from shading the dome's side view. The window is open to the top as a slot so the board can slide in with its dome on; a tongue on the lid closes it.
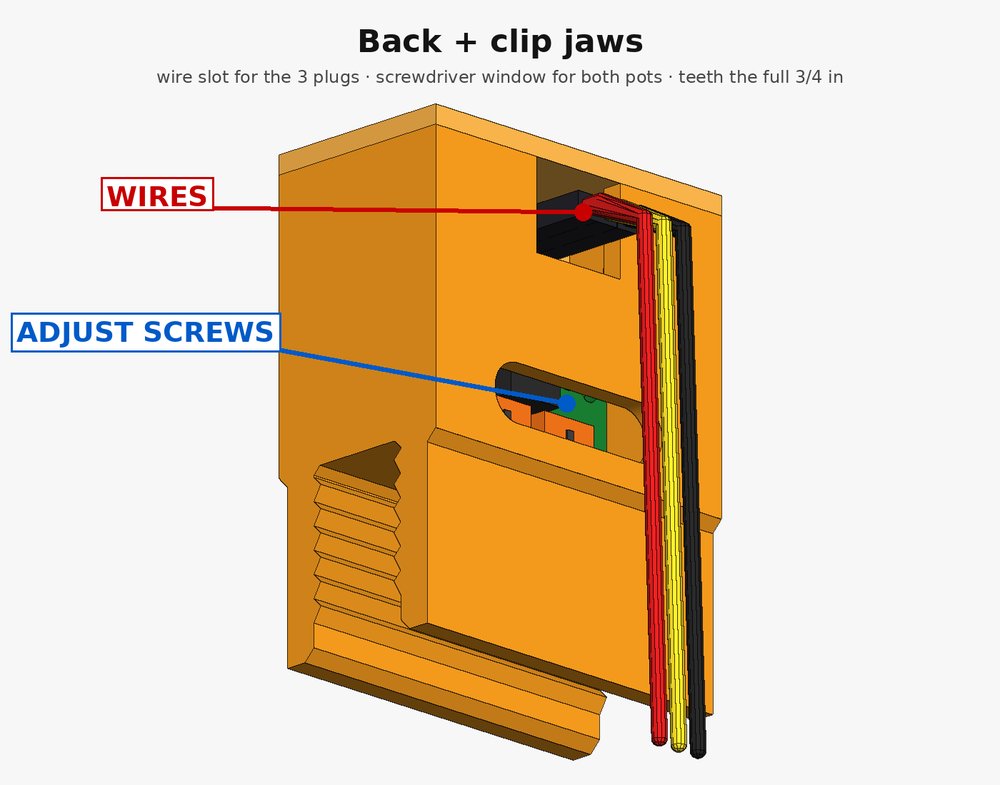
- Back: an 11 x 9.5 mm U-slot for the three Dupont plugs (they stick out about 4 mm), and a 22 x 6 mm screwdriver window over both trim pots. Sensitivity and delay can be adjusted with the case closed.
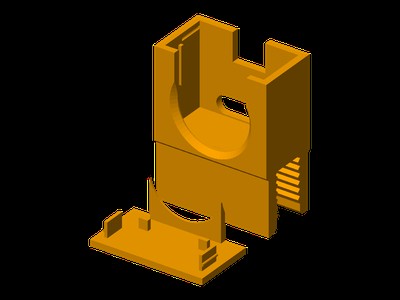
- Lid: two 1.0 x 5 mm legs with 0.5 mm bumps click into grooves in the side walls (about 0.3 mm of interference). Two tabs on the lid hold the board down.
The clip
The clip is a U under the floor that runs the full 37.6 mm width of the case. Each jaw is 19.05 mm (0.75 in) long and 3.5 mm thick, with a 1.2 mm lead-in at the tip. The gap is 11.5 mm at the root, and each jaw has 6 sawtooth teeth, 0.9 mm tall on a 2.4 mm pitch, with the steep catch face up and the shallow ramp down. That leaves 9.7 mm between the tooth tips, so it grips rims about 9.7 to 11.5 mm thick: it slides on easily and bites when pulled up.
Print settings that worked
The case in the photos was printed in ABS with these settings (they are in abs_raft_profile.ini):
- Nozzle 240 °C, bed 100 °C
- 0.2 mm layers, 0.4 mm nozzle, 4 perimeters, 40 percent gyroid infill
- Raft: 3 layers, 0.2 mm contact gap, 1.5 mm expansion. No brim, no skirt.
- No supports. The body prints upright with the jaw tips on the bed; the only bridges are the 11.5 mm floor between the jaws and the top of the pot window. The lid prints top face down.
- Body and lid fit on one plate: 248 layers. PrusaSlicer estimated 2 h 50 min and about 16 g of ABS (15.3 cm³, 6.37 m of filament). The real print took about 3 h 08 min on OctoPrint.
Assembly
- Plug your three Dupont jumpers onto the sensor's header.
- Slide the board down into the side slots, dome toward the front window, header edge up. The plugs come out through the back slot.
- Press the lid on until it clicks.
- Push the clip straight down over the rim.
Changing it (OpenSCAD)
The adjustable values are at the top of turtle_pir_case.scad. Edit, press F6, export the STL (part = "print_body" or "print_lid" gives the print-oriented parts).
gap: jaw face to jaw face at the root, 11.5 mm. Measure your rim and set it a little over the thickness.tooth_h,tooth_p: tooth height (0.9 mm) and pitch (2.4 mm).jaw_len: how far the jaws reach below the floor, 19.05 mm.clr: board side clearance, 0.35 mm.pcb_w,pcb_h,lens_d: the board and dome size, from the HC-SR501 datasheet.
The design was drawn in OpenSCAD with AI help, from the HC-SR501 datasheet dimensions.